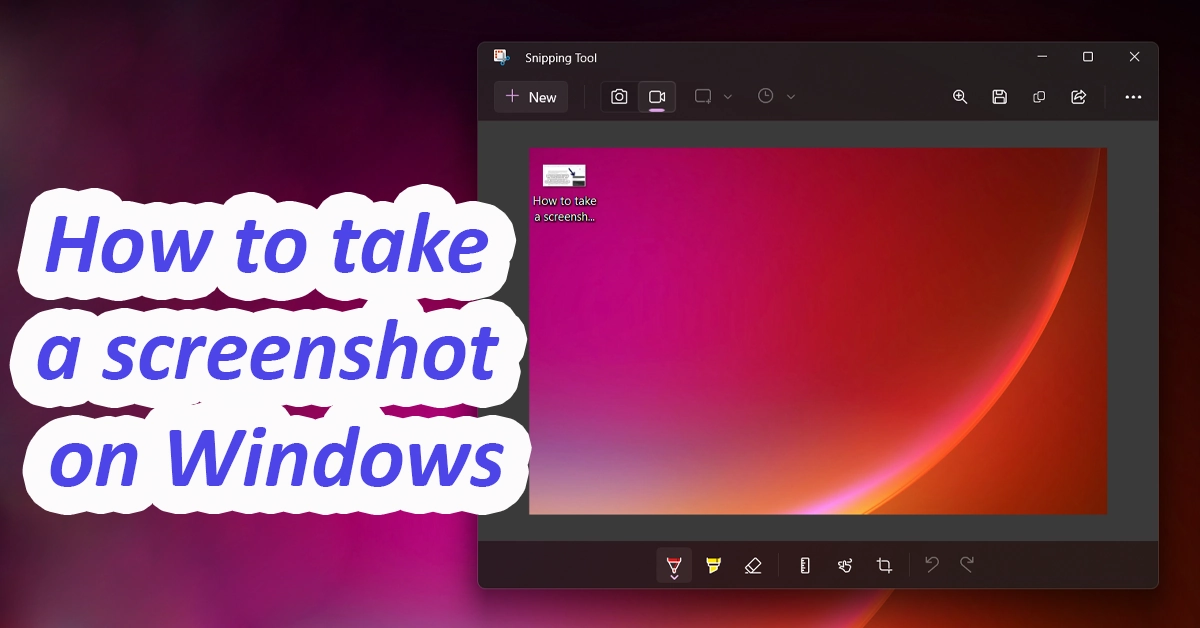
How to take a screenshot on Windows – 3 Easiest Methods
Screenshots are a useful way to capture and share information from your computer screen. Whether you want to save an error message, capture an important document, or share a funny meme, taking a screenshot is a quick and easy way to do it. While taking a screenshot is relatively easy on your smartphone, but on Windows there is still a lot of confusion. In this article, we will discuss how to take a screenshot on Windows.
There are several ways to take a screenshot on a Windows computer. Here are some of the most common and easiest methods:
Table of Contents
Method 1: Using the Print Screen key
The Print Screen key (sometimes labelled as PrtScn or PrtSc) is a button on your keyboard that can capture an image of your entire screen. To take a screenshot using the Print Screen key, follow these steps:
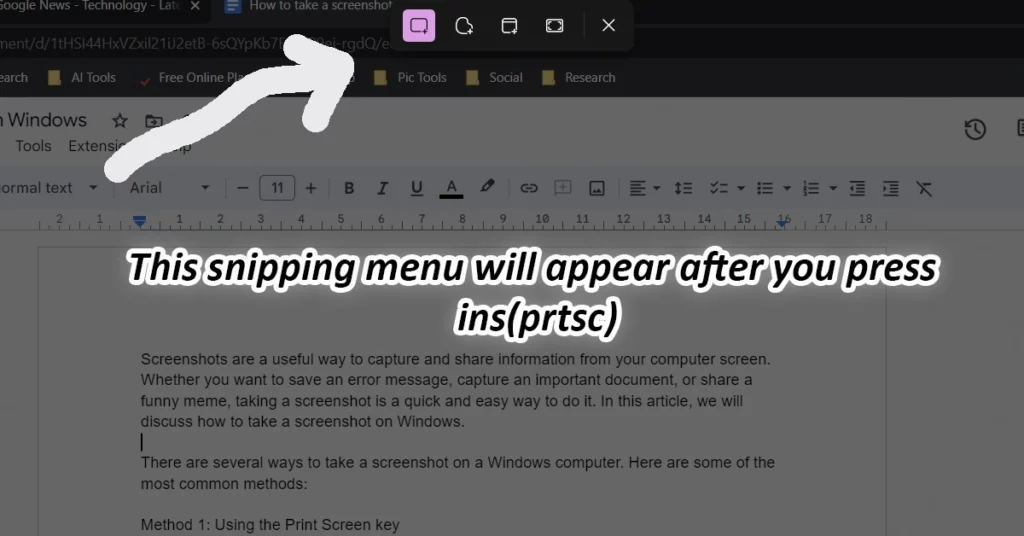
Step 1: Make sure that the content you want to capture is on the screen. Now press the ins (prt sc) button, present right after the F12 key. After you click it, a popup at the top will appear where you can select the shape in which you want to take the screenshot. As you can see the first one is rectangular, which is the most common. Click on it and draw a rectangle around the subject you want to take the screenshot of. You can leave the taskbar or any other sensitive info that you may not want in the screenshot. This is not possible in full-screen screesnhot, where you take a full screen grab of your screen and then blur out other stuff.
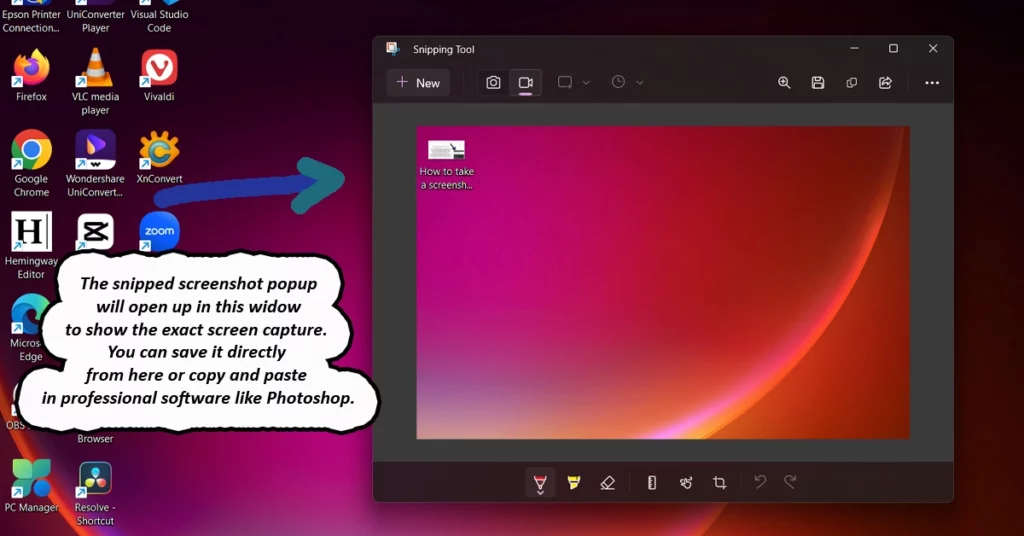
Step 2: Now after you draw a rectangle around the subject with mouse, the screenshot will get copied into your clipboard. And a pop-up will appear at the bottom of the screen. You can save it directly as a png file, or click and copy it to edit it further in any image editing software.

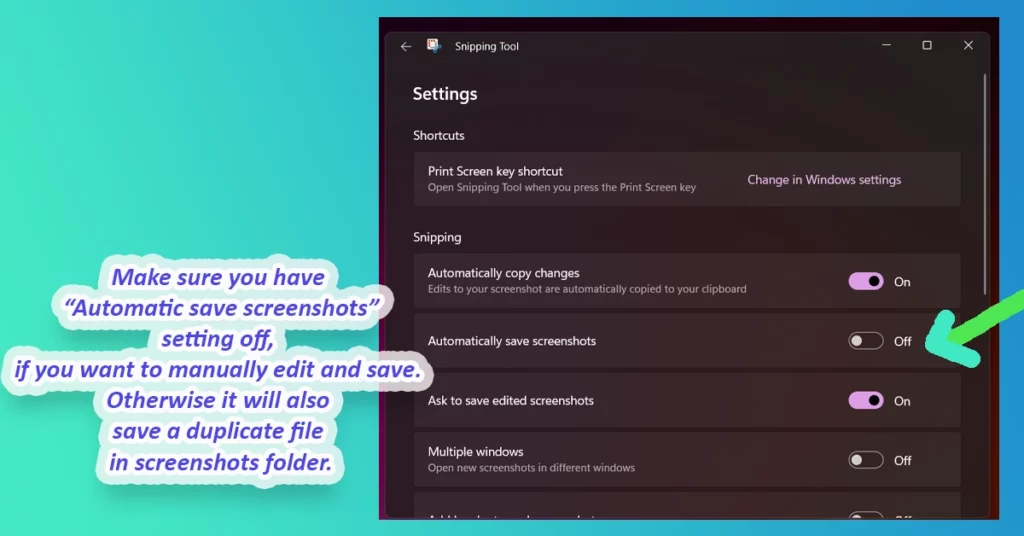
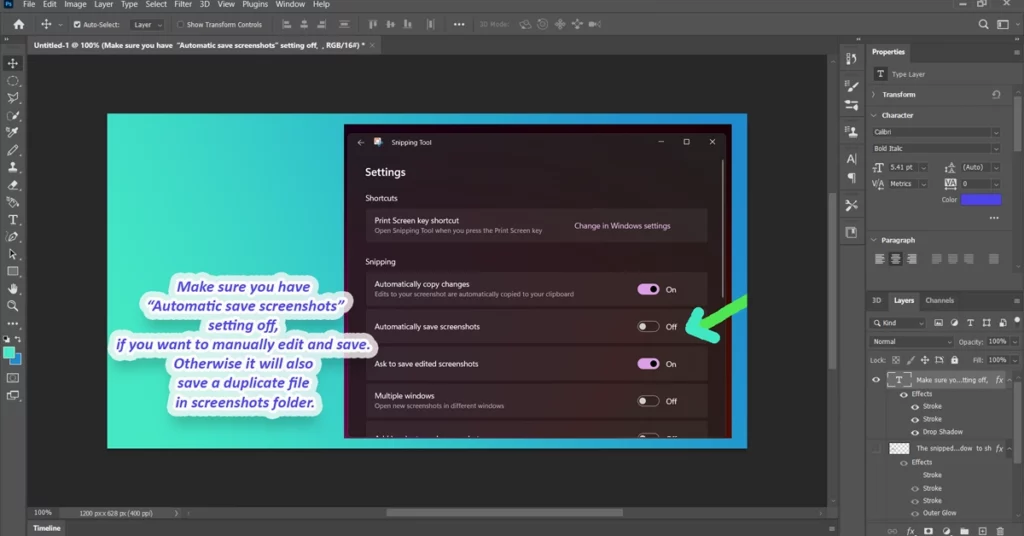
Make sure you have the “Automatic save screenshots” option turned off if you don’t want to automatically save the snipped screenshot. If you manually want to check and edit before saving, turn it off, as it creates a duplicate file in the screenshot folder. If you don’t want to edit manually, you can just let it be on, and it will get saved in the folder as it is. It will not give you the option to name the file and save it. Instead, it will get saved as screenshot followed by the date, which can be hard to sort after some time.
Next, to edit the screenshot taken and name it as per your wish, open the popup of snipping tool and edit with basic tools and renaming the file there itself. You have the option to share from there itself. This should suffice for most of the users.
However, if you want to edit the screenshot taken professionally, you can copy (CTRL+C)the screenshot from the snipping tool and then open an image editing program, such as Microsoft Paint or Adobe Photoshop. Then paste (CTRL+V) it over there, just as shown in the image.
With Professional editing tools, you can get the picture in any format you want and with professional editing tools, you have many more options. However, if you don’t get the snipping options with ins prt sc key, then enable it through accessibility settings.

Method 2: How to take a screenshot on Windows Using the Windows + Print Screen key
If you want to save the screenshot directly as an image file, you can use the Windows + Print Screen key combination. This method captures an image of the entire screen and automatically saves it as a PNG file in the “Pictures” folder. This is the easiest method to screenshot on Windows, but provides less customization. To use this method, follow these steps:
Step 1: Make sure that the content you want to capture is on the screen.
Step 2: Press the Windows + Print Screen key. The screen will flash briefly indicating that a screenshot has been taken.
Step 3: Open the “Pictures” folder on your computer. You should see a new folder called “Screenshots.” Open this folder to find your screenshot. You can rename and edit the files manually from there.
Method 3: How to screenshot on windows Using the Snipping Tool
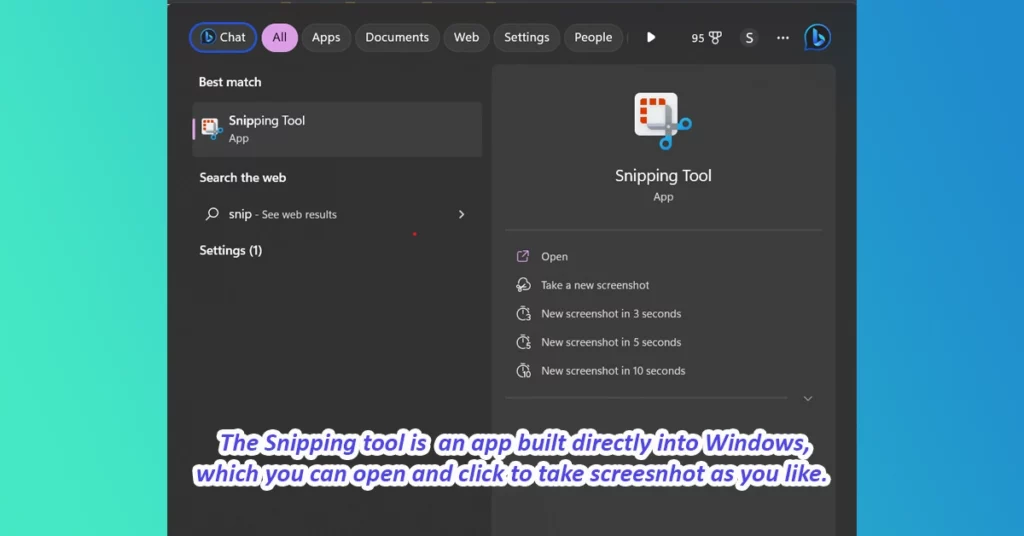
The Snipping Tool is a built-in Windows app that allows you to capture a specific area of your screen. To use the Snipping Tool, open the Snipping Tool by searching for it in the Start menu.
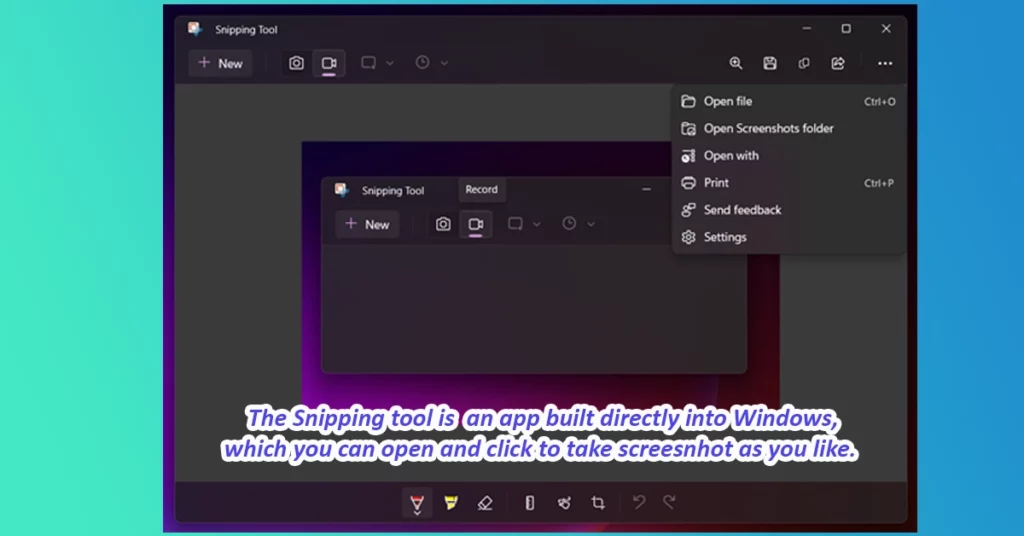
Now click the “New” button to start a new snip. In the right corner, you can find more settings like timer, folder, and other properties.
After clicking “New” with the camera icon, you can draw a rectangle to get the screenshot and save it and edit from there. Here you get the same editing options as shown in the first method.
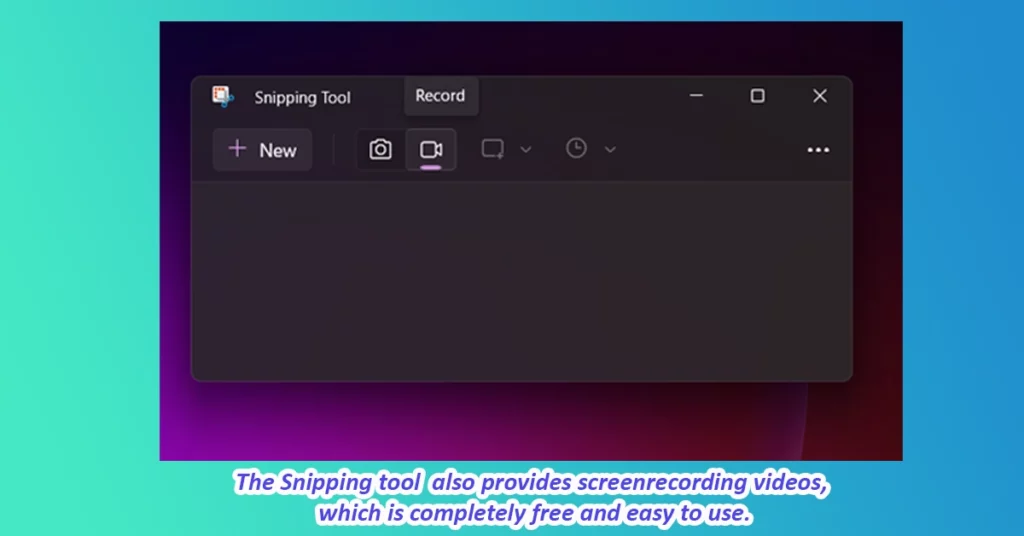
Aside from taking a screenshot, the snipping tool also provides you with a free screen recording feature as shown in the image below. However, you don’t have control over the voice input for now, as this tool is very new from Microsoft and it may get added in the future. However, the screen recording is saved in an mp4 format, where you can add voice manually from other editing software.
Where to find screenshots on Windows?
Screenshots on Windows are usually saved in the “Screenshots” folder, which can be found in the “Pictures” folder in your user directory. If you have changed the default location for saving screenshots, you can search for the file by name using the Windows search function.
FAQs
How to take a screenshot on Windows?
There are several methods to take a screenshot on Windows, such as using the Print Screen key, Windows + Print Screen key, or the Snipping Tool.
How to screenshot on windows and save the file?
After taking a screenshot, you can save it by pasting it in an image editing program and saving it as an image file, or it can be automatically saved to a designated folder.
Can I edit a screenshot after taking it on Windows?
Yes, you can edit a screenshot using an image editing program or the built-in editing option in the Snipping Tool.
Is there a built-in app to take screenshots on Windows?
Yes, the Snipping Tool is a built-in Windows app that allows you to capture a specific area of your screen.
Can I record my screen using the Snipping Tool?
Yes, the Snipping Tool has a built-in screen recording feature that allows you to record your screen and save it as an mp4 file.
Where do screenshots go on windows 10
Screenshots taken on Windows 10 are usually saved automatically in the “Screenshots” folder within the “Pictures” folder. You can also access your most recent screenshot by opening the Snipping Tool or pressing Windows key + Print Screen, and then clicking the “Copy” button or the notification that appears on the lower-right corner of your screen. From there, you can paste the screenshot into an image editing program or save it manually.